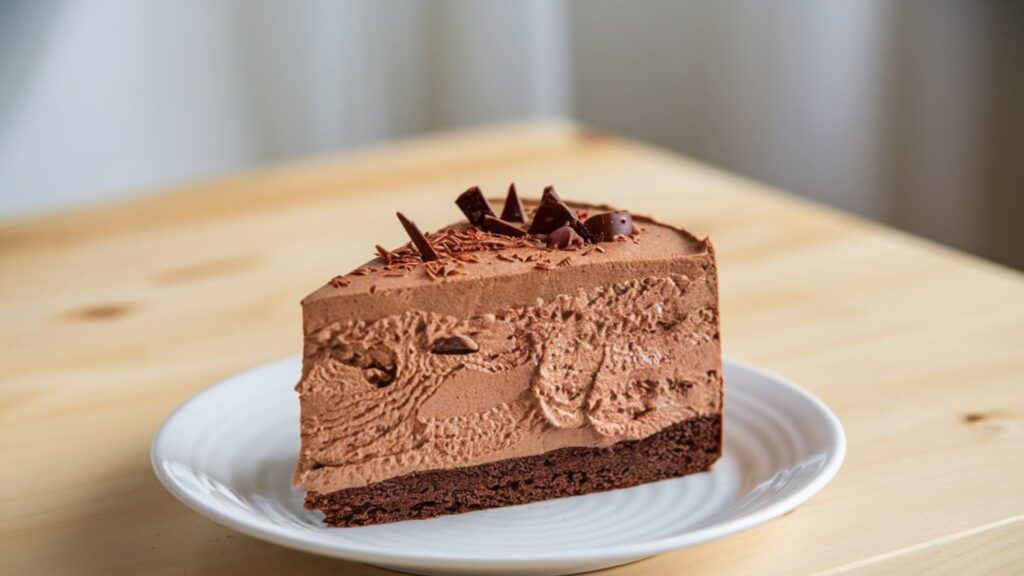
There’s something about a cake that’s just better when it has a rich, indulgent chocolate ganache filling. Imagine slicing into a chocolate cake and that smooth, velvety chocolate ganache oozes out—now that’s a moment worth savoring! Whether you’re a seasoned baker or just getting started, learning how to make the ultimate chocolate filling for a cake is a game-changer.
This recipe isn’t just about creating a filling; it’s about making your cakes unforgettable. I’ll walk you through every step and provide helpful tips along the way so you can confidently bake a cake that’s full of luscious chocolate goodness. By the end, you’ll have the skills to create a chocolate ganache filling that’s rich, creamy, and totally irresistible. Heavy cream and dark chocolate will be key in bringing out the perfect texture and flavor in your mousse-style filling.
Why You’ll Love This Recipe
- Irresistibly Smooth & Velvety: The chocolate ganache filling is incredibly smooth, creamy, and velvety. It’s like a chocolate hug in every bite!
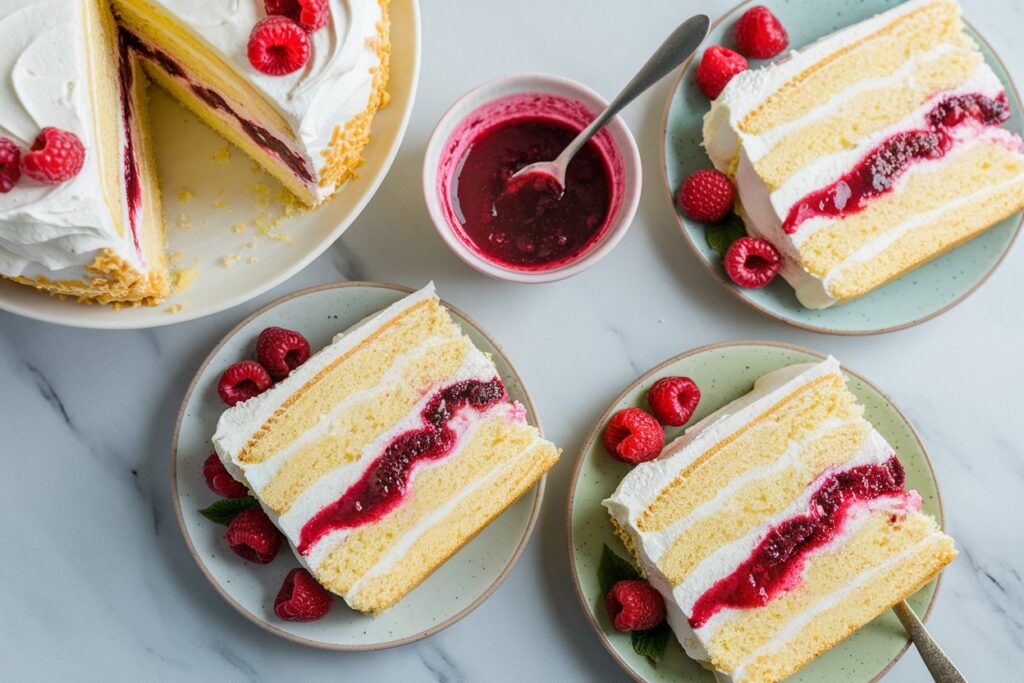
- Versatile: Whether you’re filling a chocolate cake, a vanilla sponge, or even a fruit-flavored cake, this filling complements almost any flavor, adding depth and richness.
- Easy to Make: With just a few simple ingredients, you’ll be able to whip up this delicious chocolate ganache filling without any complicated steps or special techniques.
- Customizable: Want to make it dairy-free, vegan, or spice it up with some coffee or peanut butter? This recipe is super adaptable to your preferences.
- Impress Your Guests: The smooth, glossy chocolate ganache filling looks and tastes like it came from a professional bakery, but it’s easy enough for home bakers to master.
- Perfect for Any Occasion: Whether it’s a birthday, anniversary, or just a weekend treat, this chocolate filling is the star of any celebration.
- Satisfy Your Chocolate Cravings: If you’re a true chocolate lover, this recipe will hit the spot every single time – it’s rich, decadent, and deeply satisfying. Add a bit of dark chocolate and heavy cream for that indulgent mousse-like texture.
It’s one of those recipes that’ll make you feel like a baking expert, even if you’re still a beginner! You’re going to love how easy it is to master, and how much your family and friends will rave about it.
Recipe Overview
Prep Time:
15 minutes
Cook Time:
5 minutes
Total Time:
20 minutes
Servings:
Enough for 1 cake (approximately 8-10 servings)
Difficulty Level:
Easy
Dietary Information:
- Gluten-Free: Yes
- Dairy-Free: Option available
- Vegan: Option available
Ingredients
- 200g (7 oz) semi-sweet or dark chocolate (preferably high-quality)
- 1 cup heavy cream (for dairy-free, substitute with coconut cream)
- 1 tablespoon butter (for dairy-free, omit or use vegan butter)
- 1 teaspoon vanilla extract
- A pinch of salt
- 1/4 cup powdered sugar (optional for added sweetness)
Equipment
- Mixing bowls
- Saucepan
- Whisk or electric mixer
- Measuring spoons and cups
- Spatula
- Cake layers for assembly
Step-by-Step Instructions
Step 1: Chop the Chocolate
Start by chopping your dark chocolate into small, even pieces. The smaller the pieces, the easier they’ll melt. If you’re using chocolate chips, you can skip this step since they melt quickly on their own!
Step 2: Heat the Cream
In a small saucepan, heat the heavy cream over medium heat. Stir it gently until it’s hot, but not boiling. You’ll know it’s ready when small bubbles begin to form around the edges. Be careful not to let it come to a full boil because it could affect the smooth texture of your chocolate ganache.
Step 3: Melt the Chocolate
Once the cream is hot, pour it over the chopped chocolate. Let it sit for a minute or two to allow the heat to melt the dark chocolate. Then, use a whisk or spatula to stir the mixture gently until it’s completely smooth and glossy. The chocolate should melt into the cream perfectly, creating a rich, velvety chocolate ganache.
Step 4: Add Butter and Flavoring
Stir in the butter (if using) and vanilla extract. The butter adds a silky richness, while the vanilla enhances the flavor of the chocolate. A pinch of salt can be added to balance the sweetness and bring out the chocolate’s depth. If you want a sweeter filling, feel free to add a little powdered sugar—about 1/4 cup should do the trick.
Step 5: Let the Ganache Cool
Allow your chocolate filling to cool slightly at room temperature. The ganache will thicken as it cools, which will make it easier to spread between your chocolate cake layers. If you want a thicker filling, pop it in the fridge for about 10-15 minutes, stirring occasionally.
Step 6: Use Your Chocolate Filling
Now that your filling is ready, it’s time to assemble your chocolate cake! Spread a generous layer of the chocolate ganache between each cake layer. For an extra indulgent touch, you can pipe some filling around the edges or top it off with a beautiful chocolate ganache swirl.
Pro Tips for the Best Chocolate Filling
- Quality Matters: The quality of the chocolate you use will make a big difference. Opt for high-quality semi-sweet or dark chocolate (at least 60% cocoa) for a rich and balanced flavor in your chocolate ganache.
- Don’t Overheat the Cream: When heating the heavy cream, be careful not to bring it to a full boil. This could cause the cream to separate, which can ruin the smooth texture of the chocolate ganache.
- Try Adding Coffee: If you love coffee, try adding a teaspoon of instant coffee or espresso powder to the hot cream. It will deepen the chocolate flavor and create a more complex filling, perfect for your chocolate cake.
- Chill for Thicker Filling: For a firmer, thicker filling, refrigerate the ganache for 10-15 minutes before using it. This will make it easier to spread and create a more structured filling for your chocolate cake layers.
- Coconut Cream for Dairy-Free Options: For a dairy-free filling, use coconut cream instead of heavy cream. It adds a slight coconut flavor, but it complements the chocolate beautifully and works well in both mousse and ganache-based fillings.
Variations You Can Try
1. Chocolate Mousse Filling
For a lighter, airier texture, you can fold whipped cream into the chocolate ganache to create a mousse-like filling. Simply whip 1 cup of heavy cream until stiff peaks form and gently fold it into the cooled ganache. This gives you a fluffy, mousse-like filling that’s perfect for layered chocolate cake.
2. Peanut Butter Chocolate Filling
If you’re a peanut butter fan, mix in some creamy peanut butter for a nutty, indulgent twist. Add about 1/2 cup of peanut butter to the hot cream before pouring it over the dark chocolate for a filling that’s both sweet and savory.
3. Chocolate Hazelnut Filling
For those who love hazelnut flavors (hello, Nutella!), add 1/4 cup of chocolate ganache or chocolate hazelnut spread to the ganache mixture. This creates a creamy, nutty filling that pairs perfectly with rich chocolate cake.
4. White Chocolate Filling
If you prefer something sweeter, try using white chocolate instead of dark chocolate. White chocolate ganache filling is light and creamy, making it a great choice for a contrast filling, especially in fruit cakes.
5. Spiced Chocolate Filling
Give your chocolate ganache filling a warm, spicy kick by adding a pinch of cinnamon, nutmeg, or even chili powder. These spices enhance the chocolate’s flavor, creating a cozy, comforting filling perfect for fall or holiday chocolate cake.
Conclusion
Now you’ve learned how to make the ultimate chocolate ganache filling for a chocolate cake! Whether you stick with the classic chocolate ganache or experiment with one of the variations, this filling is sure to make your cakes shine. It’s smooth, rich, and absolutely delicious—just the thing to take your baking to the next level.
So, gather your ingredients, put on your apron, and get ready to wow your friends and family with your cake-making skills. Whether you choose a mousse filling or a classic chocolate ganache layer, it’s bound to impress. Happy baking, and remember: life’s too short for bad chocolate cake!